

Infectious Summoner
(a Legion of Minions + poison bolts galore + a long reach ability)
♦ ◊ ♦ ◊ ♦
This build is a complete lvl 60 setup and is UP-TO-DATE with the game post-launch & the Snow & Steam December update. The subclass used is Bane. I believe the build can be amazing when geared and it seems like a meta build. Just like any build, in the right hands, this setup should be able to finish all Fazeer stages. It can dish out massive damage when we are playing it well & our energy is pre-filled. A good source of damage of this build is the DPS buff of Miasma (+25% dmg) + the Tier 2 passive bonus from Loyal Shasta that gives us +50% dmg vs Taunted enemies. When all buffs are in place we spam Explosive Arrow for DPS. But there’s another good source of DPS and that’s the combination of Scout’s Bones + Infectious Shooter + Reload Tier 3 that lets us cast Scout’s Bones 3 times rapidly and fill the screen with projectiles that can trigger procs like Spread of Death. We can also get 10 skeletons + 9 or 10 goblins + 13 spiderlings alongside Shasta as minions that can help a bit with the dmg and also serve as meat-shields. On top of that using Imbue Relic fully refills our Relic energy which allows us to keep a 100% uptime for Miasma while in combat. Miasma also gives our minions +100% dmg while at lvl 10 and this stacks with the +25% minion dmg from Puppet Master. The Frostwall Shield + either a North Mace OR a Glacier’s Edge (sword) lowers the cooldowns of item-granted skills such as Imbue Relic & Call the Legion by 25% or 50% with the set bonus which further helps with keeping Miasma up as well as using the Call the Legion more often. Add to this Ghost Visage for mobility and an escape mechanic and it’s a well rounded build.
Build Video footage:
The skills I use:
- Explosive Arrow – our main & spammy DPS skill. A very good source of damage & can be a bit better for AoE mobbing when using Herman’s Masterwork in the Legendarium.
- Scout’s Bones – Is amazing when combines with an Infectious Shooter (in the legendarium ideally) + Reload Tier 3. It will be a major source of “Proc DPS”
- Loyal Shasta – used to taunt enemies and keep them grouped up for our dmg spam also makes taunted enemies take 50% more dmg. Can do some more dmg + heal us when the Shasta’s Promise shield is equipped/slotted in the Legendarium.
- Call the Legion – we use it to summon 10 Skeletons every 60 seconds (with Frostwall the cooldown goes down to 45s. or 30s. when we have the set bonus)
- Goblin Legion – we use it to summon 2 Goblins + up to another 3 when using Precision Skills + a Goblin Brute + 3 Goblin Gunners (from the Ryeful of Leedershap)
- Reload – resets the cooldowns of all Adventurer Skills and also fully restores our ammo
- Ghost Visage – our escape mechanic and a movement skill. We also get 50% crit chance for the next 3 uses of Explosive Arrow after using it
- Imbue Relic – fully re-fills our Relic energy. Granted by the Ancient Ember Boots. Can also recharge the cooldown of Arachnid Assault (which we don’t use) when the set bonus is active so keep that in mind if you decide to use that skill in your build.
- Miasma – It’s a great bit of Extra DPS to nearby enemies as well as a buff +25% dmg buff + a 50% defence buff to us and nearby allies.
The gear I recommend using is:
MY IDEAL EQUIPPED GEAR:
- A good rolled + socketed 1 handed weapon from the Arctic Armaments set – Glacier’s Edge sword or the North Mace OR Blue weapon + a good rolled & socketed Frostwall Shield
- Must wear 3 Musketeer Set pieces! I suggest wearing: Musketeer Hat + Robe + Pauldrons (Shoulders):
- Musketeer Cavalier Hat – gives +1 Precision Skills (+2 with the 3 piece set bonus) [I’ve tested it now gives you extra levels and DMG if the skill is already lvl 10 and you can use this to overcap skills]
- Musketeer Pauldrons (Shoulders) – use a potion: restore a charge of Ghost Visage (2 charges restored with the set bonus)
- Musketeer Robe – gives +1 Adventurer Skills (+2 with the 3 piece set bonus) [I’ve tested it now gives you extra levels and DMG if the skill is already lvl 10 and you can use this to overcap skills]
- Ideally also wear Ancient Ember, Arc-Powered, or Winterweave pieces! I suggest those be: Ancient Ember Boots + Winterweave Pants + Winterweave Gauntlets:
You’ll be looking for flat dmg, optionally % elemental dmg and/or Crit dmg/chance, +%Evasion +%Block Chance, +%Explosive Arrow DMG, + X lvl to any skill you use as active (I suggest to try and get +X lvls to Explosive Arrow) and have more than 1 point into, + others.
- the Shoulders and Chest rolled for +% Crit Dmg
- the Chest, Shoulders and Pants rolled for +%dmg to Explosive Arrow
- the Pants + Chest will ideally also roll with + flat dmg
- the Boots can ideally be rolled for % Crit dmg and maybe elemental dmg
- Crit Chance rolls on the Hat (Helmet) and Pants is amazing too
Suggested Legendarium Powers (to fill in the gaps from items you’re wearing):
MY IDEAL LEGENDARIUM COMBO:
- Sword of the Lost Legion (greatblade) – this grants the active skill Call the Legion
- Ryeful of Leedarshap – this makes Goblin Legion spawn another 3 Goblin Gunners to fight for us
- Infectious Shooter – boosts Scout’s Bones to shoot projectiles out of the rat balls.
Ideally you wear Musketeer Robe, Hat + (Shoulders or Pants) also Frostwall + North Mace OR Glacier’s Edge, alongside Ancient Ember Boots + Winterweave Gauntlets + (any Pants or Shoulders).
Based on availability & your preference there are alternatives:
- Option 1: other Musketeer, or Winterweave or Ancient Ember, or Arc-Powered set pieces
- Option 2: My Lil’ General (only recommended when you wear or slot Ancient Ember Boots)
- Option 3: Or anything else you like (i.e. Skittering Shoulders if you need survivability)
The non-class specific shoulders now give us an active skill to slot in the skillbar which not everyone may like.
The recommended stats to look for in your items are (the list is not in order of priority and is just listing good bonuses + there’s new stats and I might have missed some which will get added later):
- + Flat Damage (any)
- +% elemental dmg (any) – starts getting very good later on when you have a nice flat to boost with this if you match the flat with the %
- +% Damage with Explosive Arrow
- +% Duration to Miasma (this is a pretty amazing bonus especially before you unlock/start using Imbue Relic)
- + Health
- + Defense (the non elemental is good for any act but lesser numbers than elemental)
- +% Critical Hit Chance (the cap is 40% but some skills will be able to get it past the cap)
- +% Critical Damage (the cap is 300%)
- +% Gear Luck (eventually try to get like 50-75% total for good drop quantity – the cap is 100%)
- +% Energy Recharge Rate is pretty good for this build
- -% Relic Energy cost is pretty good for this build
- +% Block Chance (capped at 40%)
- +% Chance to Evade damage (capped at 40%)
- +% Ammo Generation
- +% Chance to Chill – a decent CC proc
- +% Chance to Poison is a decent DoT and IMO a must have to reasonably proc Spread of Death it also stacks with other DoTs. Try to socket this on a shield/focus.
- +% Chance to Bleed and/or Burn to stack the poison with the other DoTs.
- +% Chance to Shock – a decent proc
- +% Additional Bolts Fired on Shock – a decent proc booster
- +% Chance to Stun/Slow/Blind – good but not a very important choice
The Skills and Passives I recommend are:
IMPORTANT: Keep in mind that my setup is WITH the +2 Precision & +2 Adventurer Skills levels from the Musketeer Set Hat + Robes! On top of that I did NOT “use” the extra +1,+2,+3 Skill Point(s) on my Helmet .
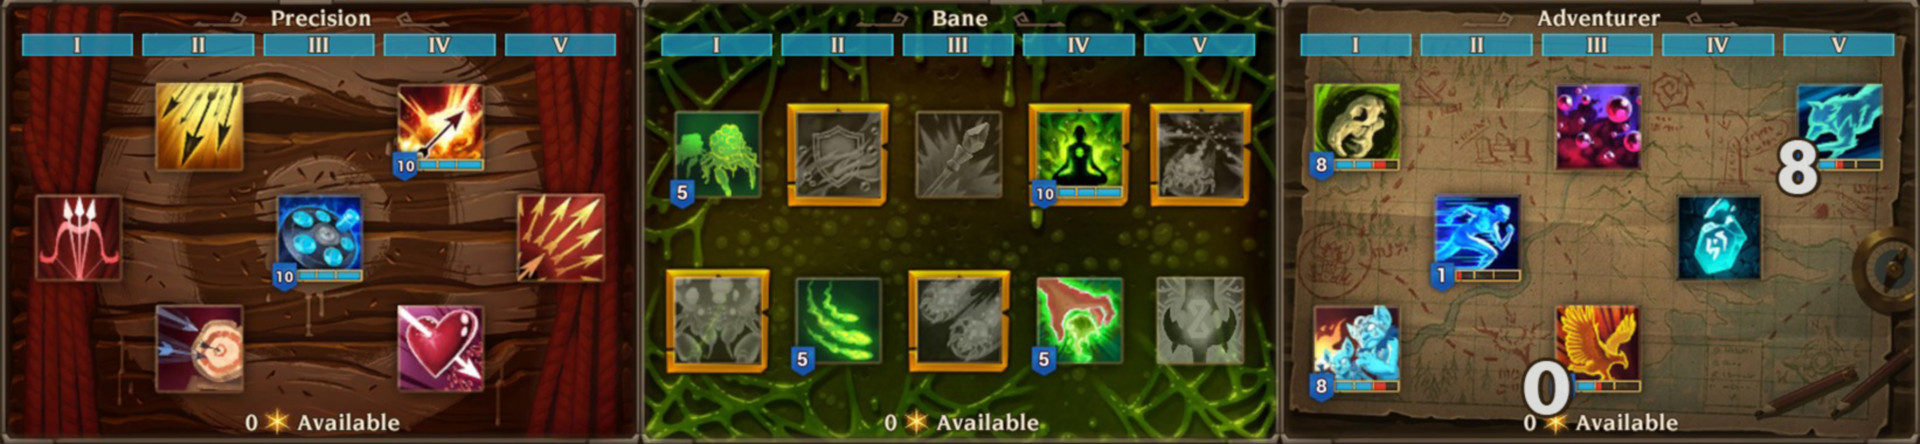
MY IDEAL/RECOMMENDED SETUP (used in the video):
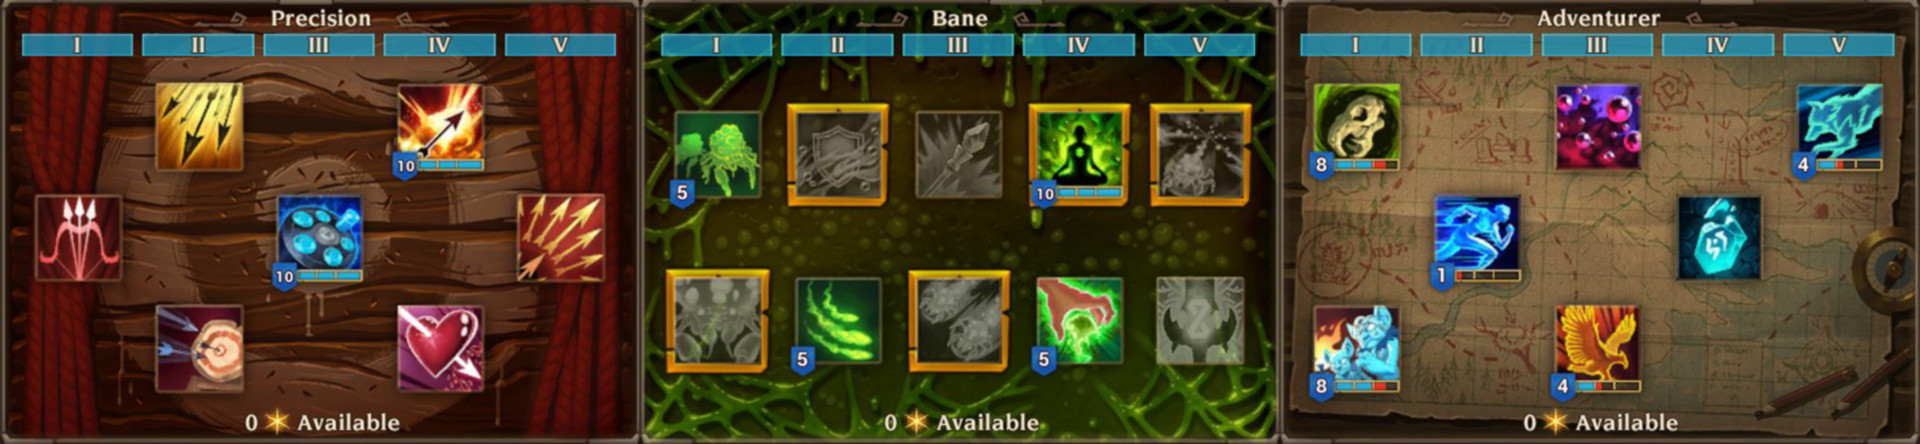
NO GOBLINS, MAX LVL ARACHNID ASSAULT + LVL 3 PUPPET MASTER:
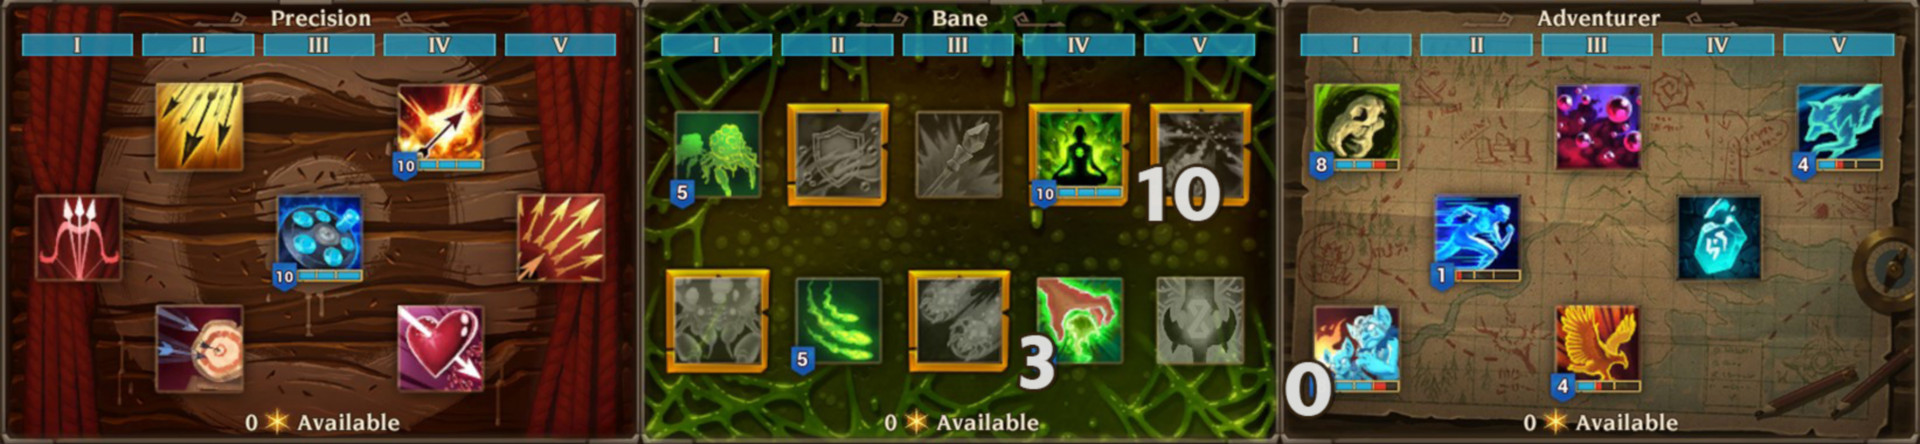
NO GOBLINS, LVL 6 ARACHNID ASSAULT + LVL 2 ENERGIZER:
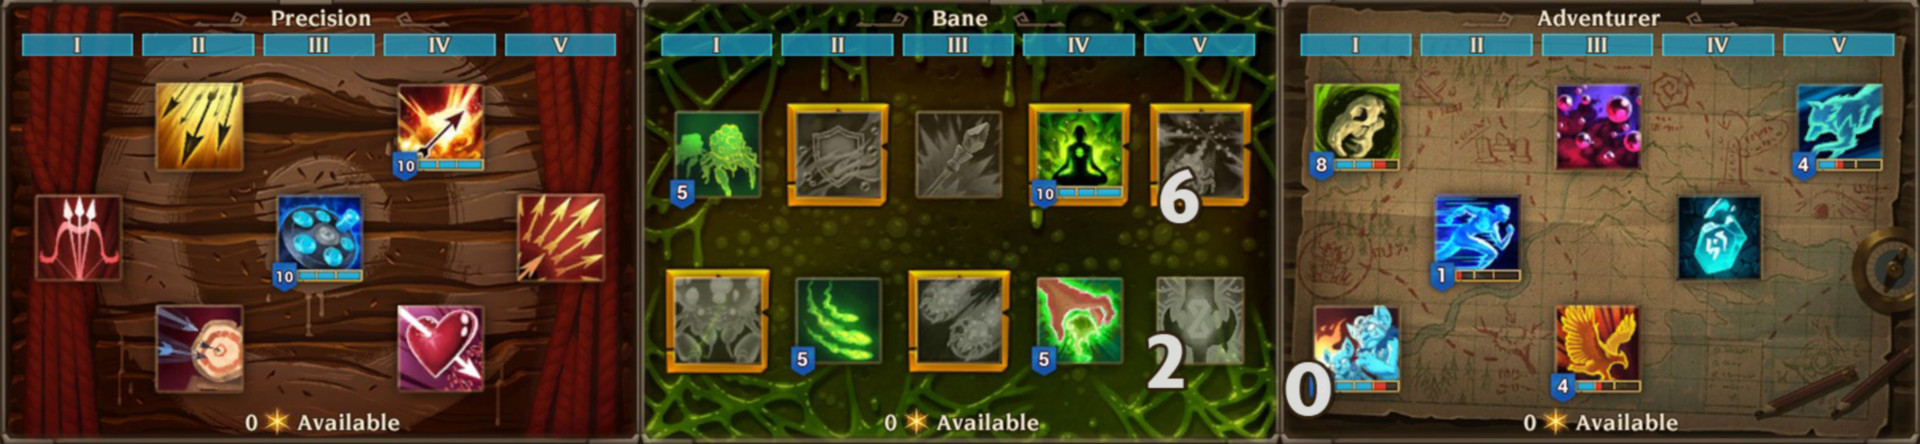
NO COOLDOWN REDUCTION, WITH TIER 3 SHASTA:
How to LVLUP the Build:
lvl 2 – get Scout’s Bones lvl 1
lvl 3 – get Goblin Legion lvl 1
lvl 4 – Save a point then @ lvl 5 – get Tier 1 (lvl 3) Ghost Visage (optionally also respec the 1 point from Tight Grouping into Targeted Strikes)
lvl 6 – get lvl 1 Spectral Spider OR save the point
lvls 7,8, 9 – Save the points
lvl 10 – get lvl 4 Reload & lvl 1 Sacrifice to Goose (or reload lvl 6) + lvl 1 Venomous Maw (if you took Spectral Spider at lvl 6 unspec that point)
lvls 11, 12 – get Reload lvls 5, 6 (or Goose lvl 1 if you did Reload lvl 6 before)
lvls 13,14 – get Venomous Maw to lvl 3
lvl 15 – get Explosive Arrow lvl 2
lvl 16 – get Explosive Arrow lvl 3
lvls 17, 18, 19 – save the points
lvl 20 – get Loyal Shasta lvl 6 by respecing the 1 point invested in Tight Grouping/Targeted Strikes
lvls 21 to 24 – get Reload to lvl 10
lvls 25 to 30 – get Explosive Arrow to lvl 10
lvls 30 to 34 – get Sacrifice to Goose to lvl 6
lvls 35 to 41 – get Scout’s Bones to lvl 10 BUT only do this if you have got the Infectious Shooter (equipped or in the legendarium), else do this step last
42-46 – get Spread of Death lvl 5
lvls 47 and up – start filling with the remaining passive skills and tiers. Also eventually unspec the points from Venomous Maw and get Miasma lvl 10 (only do this once you’ve unlocked summons for the legendarium such as Sword of the Lost Legion and maybe Imbue Relic). I’d start with. Hopefully, at this point you have +2 skill point bonuses from the Musketeer Set so that you can get start removing the extra points from your skills and putting those where needed. I’d keep Reload and Explosive arrow at lvl 10 even with the +2 levels so i get faster Cooldown on Reload and More Dmg on Explosive Arrow. If you don’t like Explosive Arrow just use any other precision skill you like instead.