
What The STRUCK is Disciples: Liberation?
(turn-based combat with a twist + base & army management + solid itemization & looter elements)
♦ ◊ ♦ ◊ ♦
Disciples: Liberation fully launched on October 21st, 2021 for PC (Steam, Epic [creator link]. After several days of playing the game & completing my 1st playtrough I’m ready to share my Final Impressions and explain “What The STRUCK is Disciples: Liberation“.
Disciples: Liberation is a mature, dark fantasy strategy RPG with turn-based combat. Liberate the land of Nevendaar and uncover the endless stories hidden within this richly detailed world where every decision has a consequence, and every wrong move could be deadly.
80+ hour single-player campaign: experience a sprawling dark fantasy epic over three acts, with more than 270 quests and objectives, and five unique endings to unlock
This post could end up getting expanded and updated eventually but, hopefully, for now it includes enough information to serve as a basic guide on top of a final impressions article.
Video Version:
The Story:
This is how the game is described by the devs:
Disciples: Liberation is a mature, dark fantasy tactical role-playing game. Liberate the land of Nevendaar and uncover the endless stories hidden within this richly detailed world, where every decision has a consequence, and every wrong move could be deadly.
Explore a rich overworld and align with a variety of in-world factions: from a human empire tinged by religious extremism to the dark forces of the undead lead by a mad queen. Assemble a team to gather precious resources, sway political standing, and take on brutal beasts in intricate turn-based battles. Choice is everything in Disciples: Liberation and it is up to you how you write your story.
Quoted from the Official Game Website
The story begins with the main character – Avyanna & her close friend & companion Orion, who are a pair of mercenaries called the ‘Twilight Twins‘ (not actual twins, just childhood friends). They are on a mission to assassinate a certain person. One thing leads to another (trying not to spoil much here) and eventually Avyanna end up traveling (via a portal) to Yillian, a city that has been hidden to the outside world and is connected to her (again, don’t wanna spoil much).
This is when the real adventure begins. Avyanna & Orion will clear out quests one after the other visiting various locations, each with its own main story and plenty of side missions. They will meet 8 more companions and be able to shape Yillian into a bigger city by constructing buildings & upgrading them.
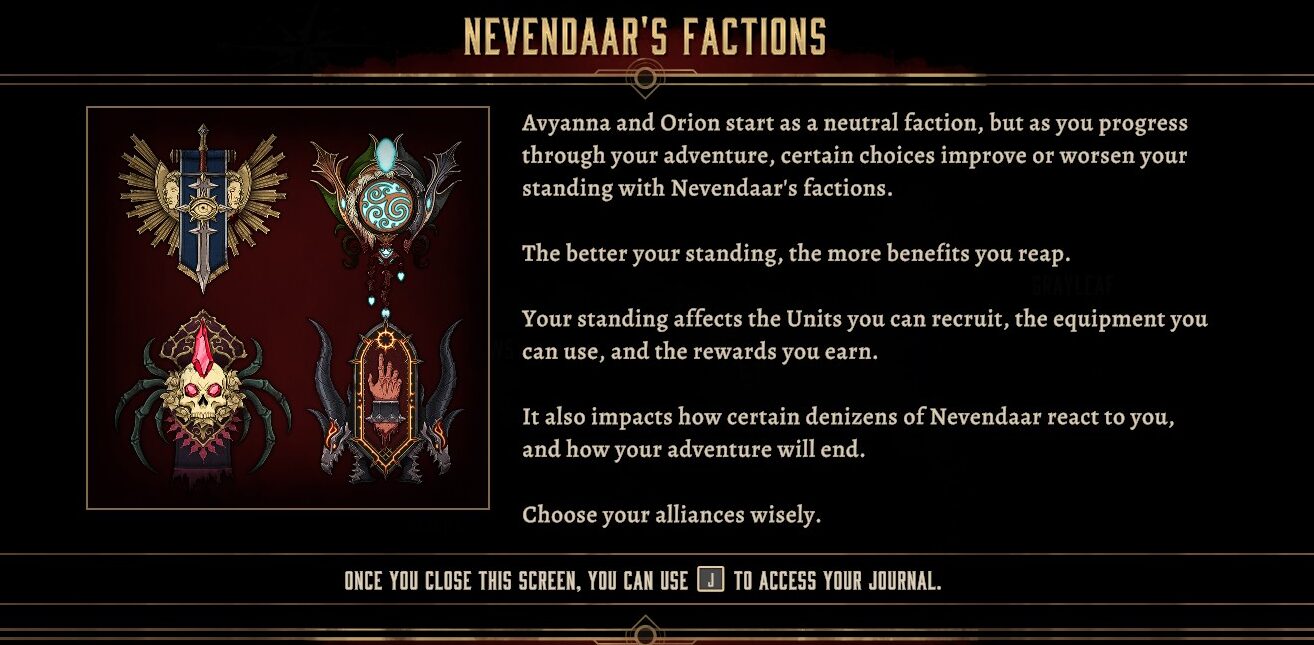
The story also allows you to choose sides while dealing with 4 different faction, which will affect your ending (there are 5 different endings). Who you side with will also impact the reputation you have with those factions, which in turn affect what units you can recruit from each faction (Tier I, II, III, IV).
The Combat:
The combat system is a somewhat traditional turn based tactical combat similar to the other disciples games, the Heroes of Might & Magic, King’s Bounty, or the Age of Wonders franchises, yet it still does things differently that all of those mentioned. Unlike HOMM, where one side acts then the other, Disciples: Liberation adopts an Initiative System that determines the order in which Units act in a round.
The higher the Initiative of a certain unit the better. The unit with the highest initiative acts first, and the one with lowest acts last. I’m not sure how the game handles cases when two units have the same initiative and if it benefits the player or the enemy in case both side have an equal initiative unit under their command. However, I’ve noticed that when my own units have equal initiative the game tend to let certain ones go first every time.
There is also an Action Points (AP) system. Each unit has 2 action points (later on our main gets a third one tho) and there are 3 types of action points: blue, red, yellow.
- Blue AP – Can be used by a Unit to perform a move. The distance (number of tiles) they move is determined by that Unit’s movement stat.
- Red AP – Can be used by a Unit to use an ability.
- Yellow AP – Can be used by a Unit to perform either a move or use an ability. Basically, Yellow AP can be used to replace both Blue & Red AP.
What color a unit’s action points are is predetermined and it’s different for each unit. Avyanna starts with 1 Blue and 1 Yellow AP but later is able to unlock 1 more Red AP. Companions always have 2 Yellow AP. Tier 4 Units also seems to always have 2 Yellow AP. The other units will be either 1 Red + 1 Blue, 1 Yellow + 1 Blue, or 1 Yellow + 1 Red.
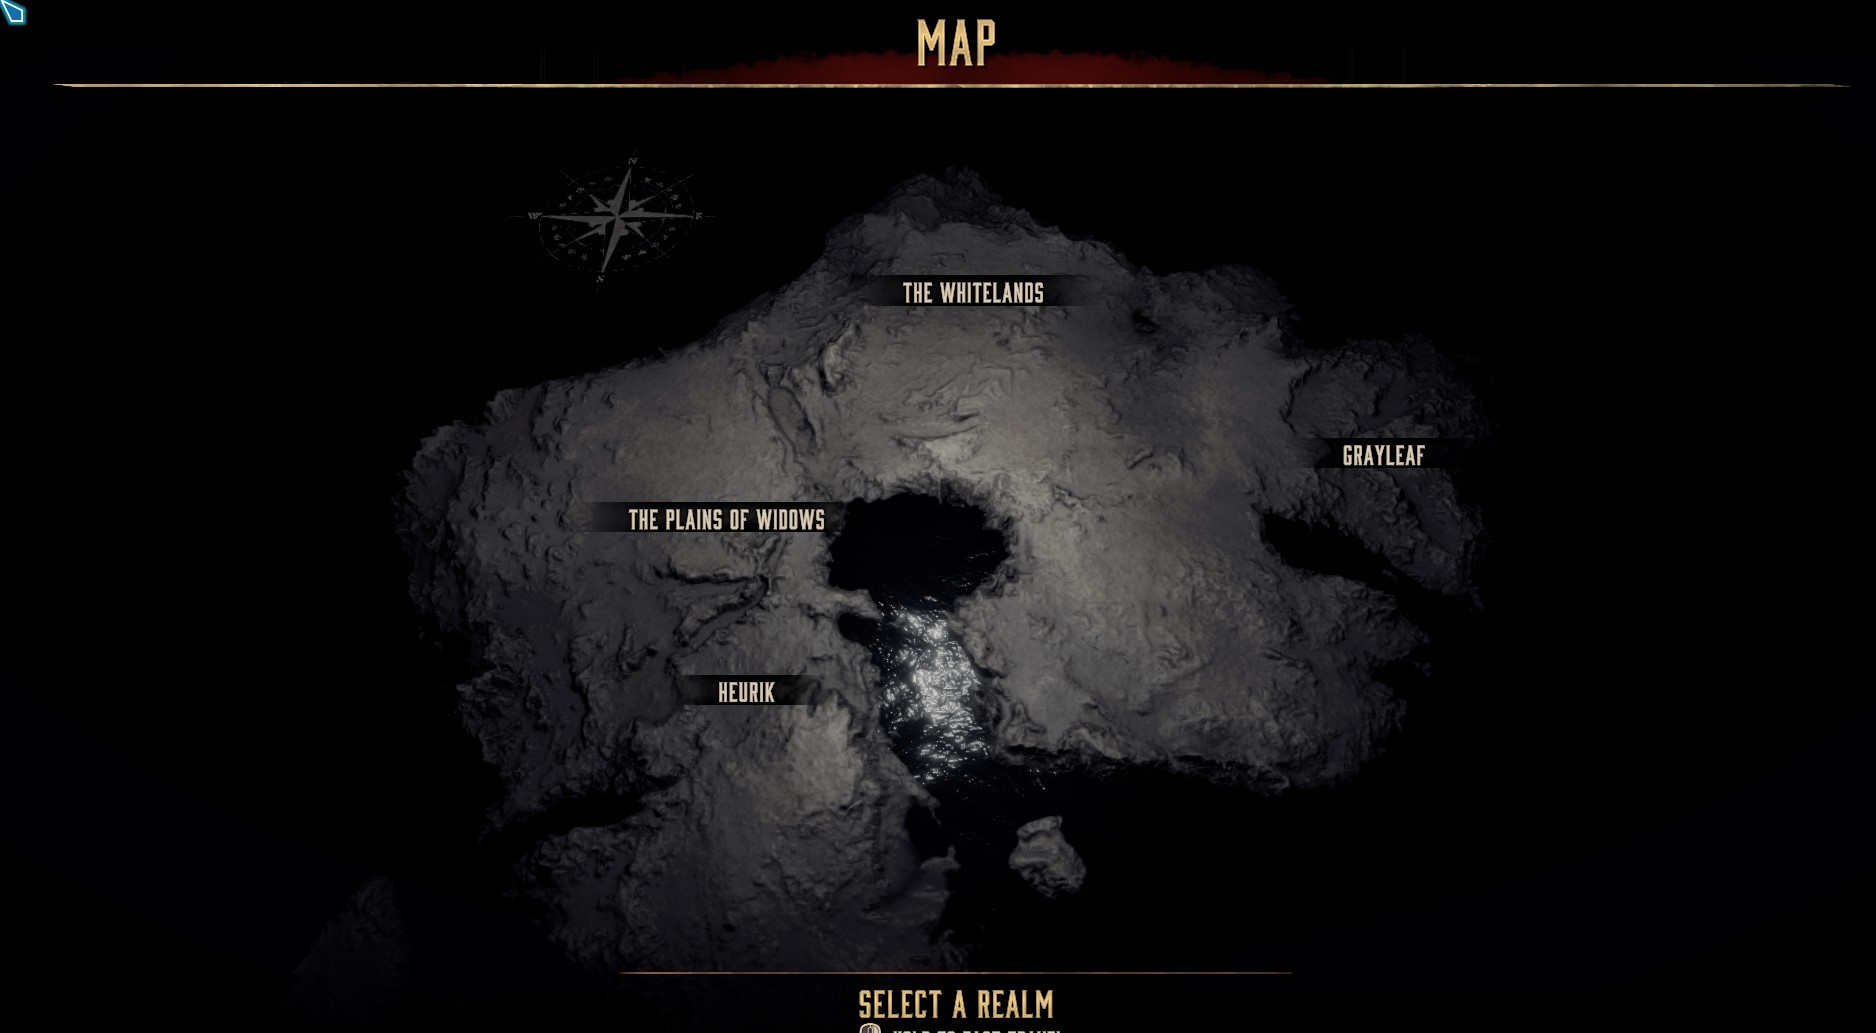
World Size & The Map:
The explorable world consists of 12 maps/zones. Each of those has a main story/quest attached to it and a lot of side quests that players can obtain by interacting with various NPCs. However, there are limit to which zones can be visited during what time of the game. At the start of act 1 you will have to choose 1 out of 4 maps (Plains of Widows, Heurik, Grayleaf, The Whitelands) and it doesn’t matter in what order you do them. Once you have started your first map the other 3 act 1 maps become locked until you’ve cleared the main mission of the map you’ve started. Then you can select a second zone, which will lock the remaining 2 but you will be able to go and revisit the first one (by talking to Orion in Yillian). After you finish map 2, you unlock map 3 (while locking map 4) and will be able to revisit the previous 2. Eventually starting map 4 will result in all 4 act 1 maps unlocked for fast travel (by talking to Orion in Yillian).
Eventually, you’ll start act 2 which will provide you with a choice of 3 new maps to clear in the same way as act 1 – by making you pick 1st, 2nd, 3rd in any order you want and temporarily locking the unpicked ones until the one you picked is cleared. You will still be able to revisit the act 1 maps while clearing the act 2 ones. Eventually act 3 will also let you clear in the exact same way. I want to avoid spoiling so I’ll be very vague by mentioning that after a certain point in the story is reached some of the maps/zones will completely change and you’ll have to revisit them to clear new main quests there. This means there are are more than 12 main quest for those 12 maps/zones due to needing to revisit some of those.
While exploring and clearing out a zone you will control/move Avyanna (& her army) via an isometric 3d point of view. You’ll do various things such as capturing resource sources (mines, lumber mills, etc.), engage in combat with enemy armies, loot pickups (loot chests, resource bundles), use HP or mana regen fountains or interact with NPCs. Some of the enemy armies will be static, while others will patrol a between points A & B. The ones that patrol will be aggressive and engage you, while the static ones in most cases will not engage until you’re very close or you engage first.
There is some quality of life under the form of “Conquer”, which is an option where the game lets you automatically win a fight if it determines your army is stronger than the enemy (usually you just need to be higher level than the enemy army – for example you & your army are lvl 11 while the enemy army are lvl 10). Conquer does not show up as an option on important fights that are linked to quests, however, it works against all those patrolling armies that are “fodder”.
Be sure to do/complete everything you can in a certain map/zone before you move on to the next one. Whatever you can not complete for one reason or another (such as not having a compan9an with a specific skill to remove a certain blockade) you can leave for later and revisit that area. By not rushing and taking your time you’ll guarantee that your level is sufficient before moving to the next map/zone and that you’ll be able to “Conquer” the fodder armies to save up time.
Quests:
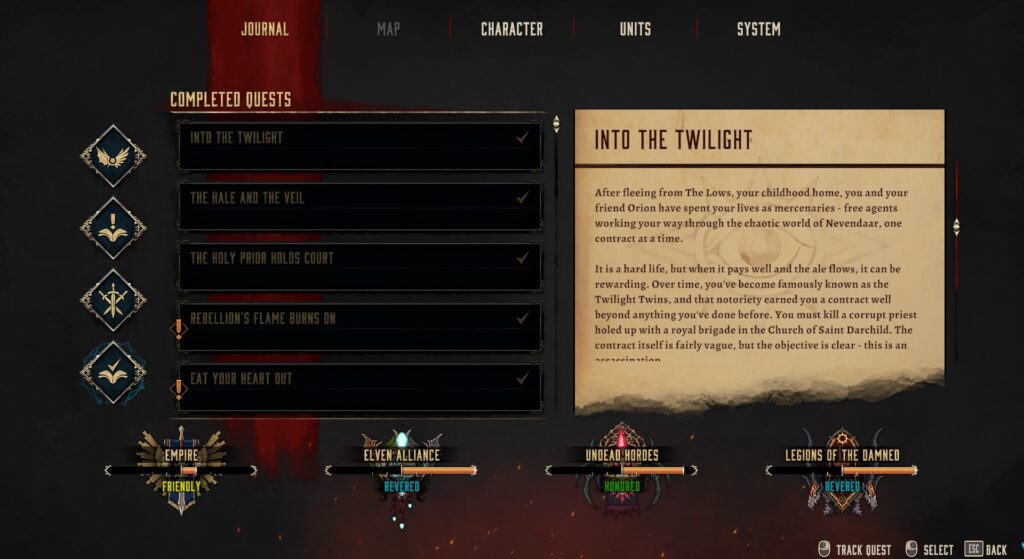
As I mentioned above, there are main quests & side quests but there’s a 3rd type of quests too – companion quests. Each zone has it’s main quests and plenty of optional side quests one can discover and complete. Companion quests are also in a way side-quest and are optional.
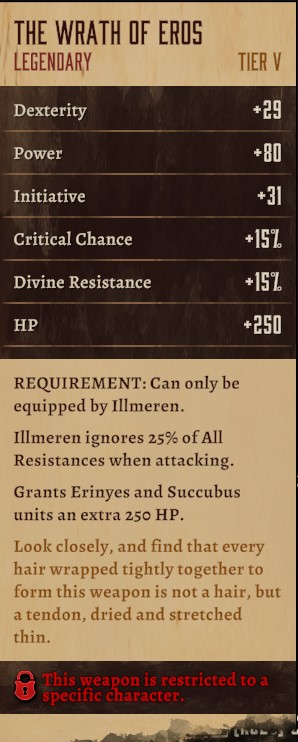
Starting companion quests has per-requisite conditions that need to be met. Some of the companions’ quests start earlier than others in the same way how some companions you meet earlier than others. Each companion will have more than a single companion quest and 7 out of 9 companions have a quest that rewards you a legendary weapon that only they can use. Not sure why the other 2 don’t have such quest… maybe they do but i made a choice sometime during my playtrough that made it so that those quests don’t appear.
The companion-specific legendary weapons will be catered towards the “assumed” playstyle that fits that character and will provide boost to not just that companion but also to units of their faction that are similar to it. For example Bagthal’s weapon gives bonus HP to Berserkers and Infernal Knights while Illmeren’s Bow gives bonus HP to Succubus and Erinyes units. Make sure to talk to your companions often to avoid missing out on any possible companion quests that you can trigger by doing so. It’s possible that some of the companion quests can only be triggered during act 1 or act 2 and not during the next acts.

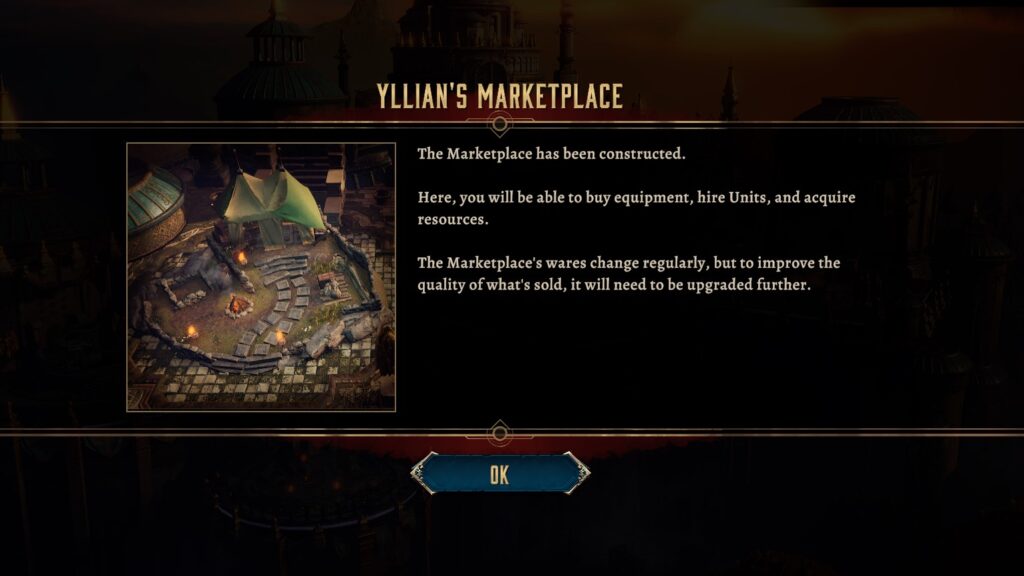
Yillian:

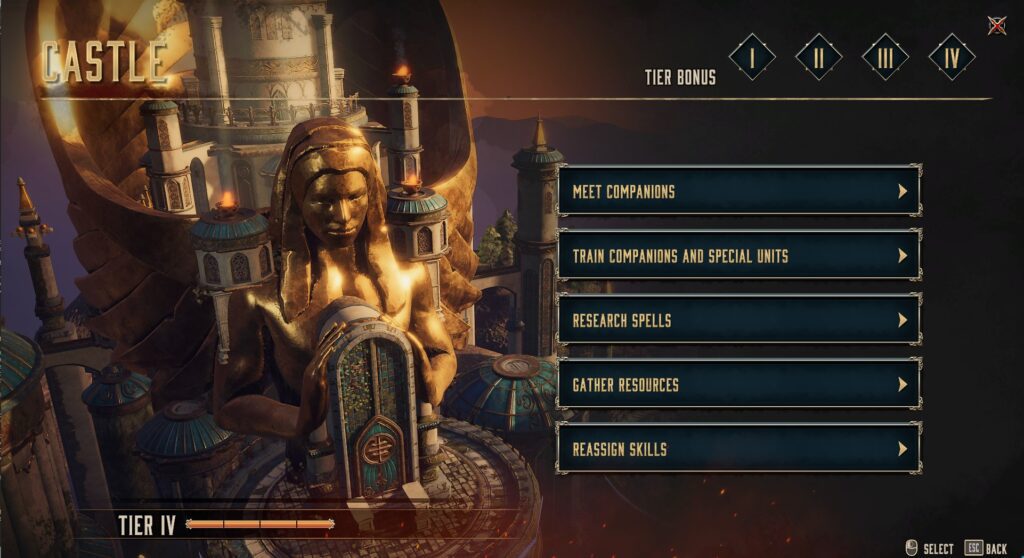
Yillian is our HQ, the base of operations for Avyanna and her companions. It is where we recruit & train units, construct and upgrade various buildings, buy and upgrade gear, merge emotion shards, talk to our companions, train special units & companions, research spells, as well as do a few other things.
There are 4 types of buildings in Yillian:
- The Castle – which is the core structure of Yillian. Upgrading the Castle improves Avyanna’s leadership points and unlocks higher tier upgrades for all other buildings. In the place we talk to your companions, train the companions & any special (named) units, research spells, gather resources & change Avyanna’s class + respec her skill points.
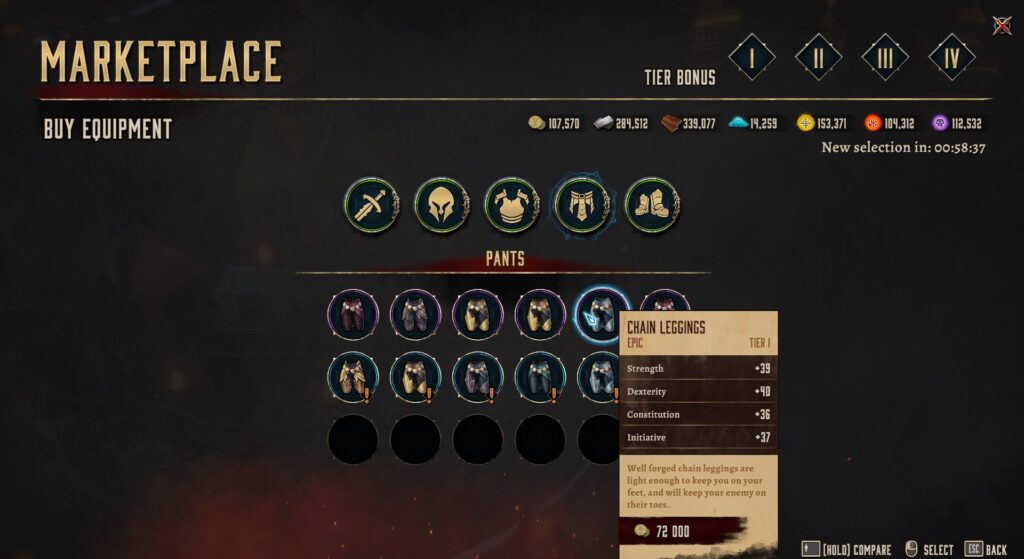
- Marketplace (1 of 2 fixed slots) – a place where we can hire mercenary units (random choice of units that changes every 60 minutes) of a tier equal to or lower than the Castle & Market tier. It’s also a place where every 60 minutes we get a random choice of items that we can buy. The item rarity depends on the market tier – T1 is green, T2 adds blue, T3 adds purple, T4 doesn’t add new rarities but maybe removes green gear from the store. The market is also where one can buy resources with gold which is a very lacking system as it doesn’t allow to exchange resources for gold or resources for other resources. Kind of a BIG missed opportunity to add more QoL here as player will find themselves with a ton of a certain resource types and nothing to do with them while there’s a lack for gold or other resources.
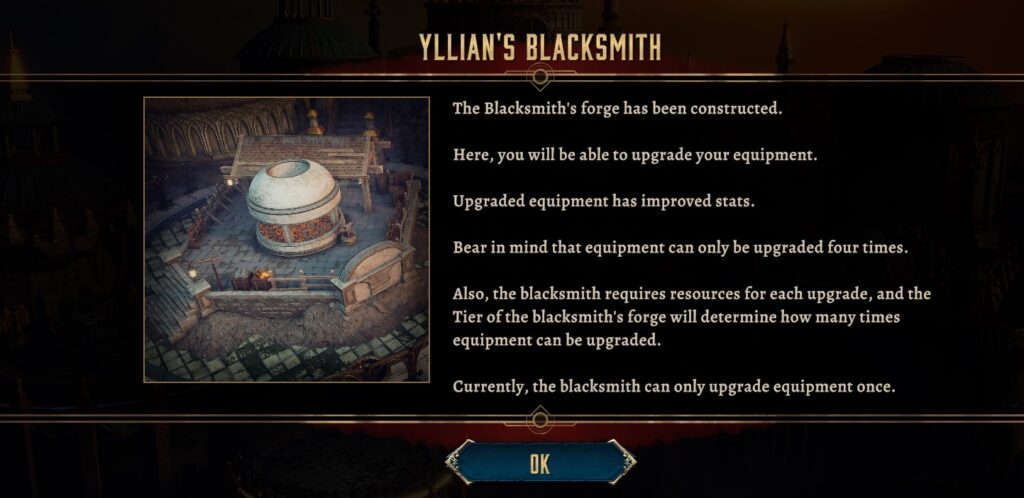
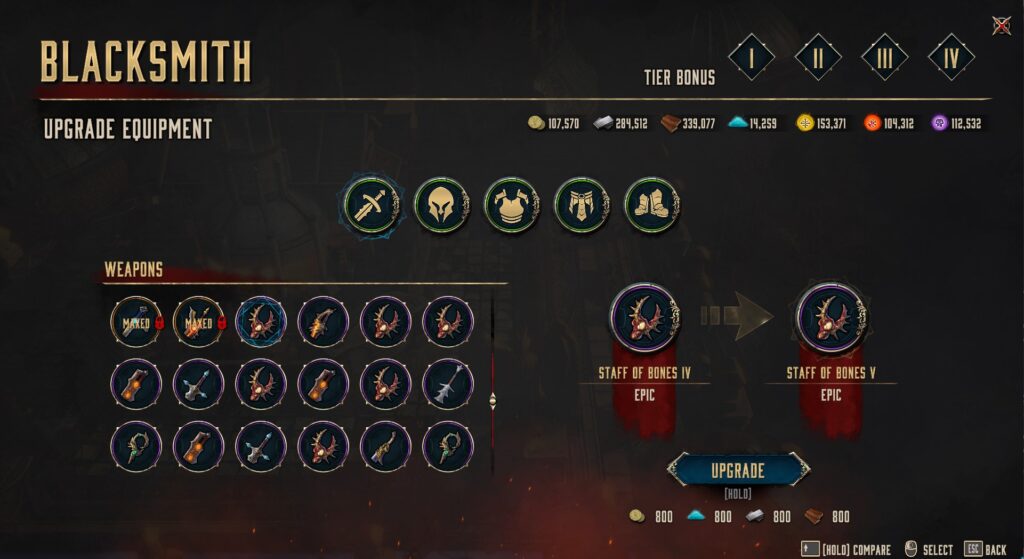
- Blacksmith (1 of 2 fixed slots) – here is where one can upgrade gear as well as merge emotion shards. Upgrading gear depends on the Blacksmith tier. At Tier 1 you can upgrade items from Tier I to Tier II. Each next Blacksmith Tier will increase the maximum Gear Tier by 1. This caps at Tier 5 (max) possible upgrade at Blacksmith Tier 4. Emotion shards don’t seem to be affected by the blacksmith tier (thankfully) so as long as you’ve obtained enough shards you’ll be able to merge all the way to legendary even if the Blacksmith is Tier 1.
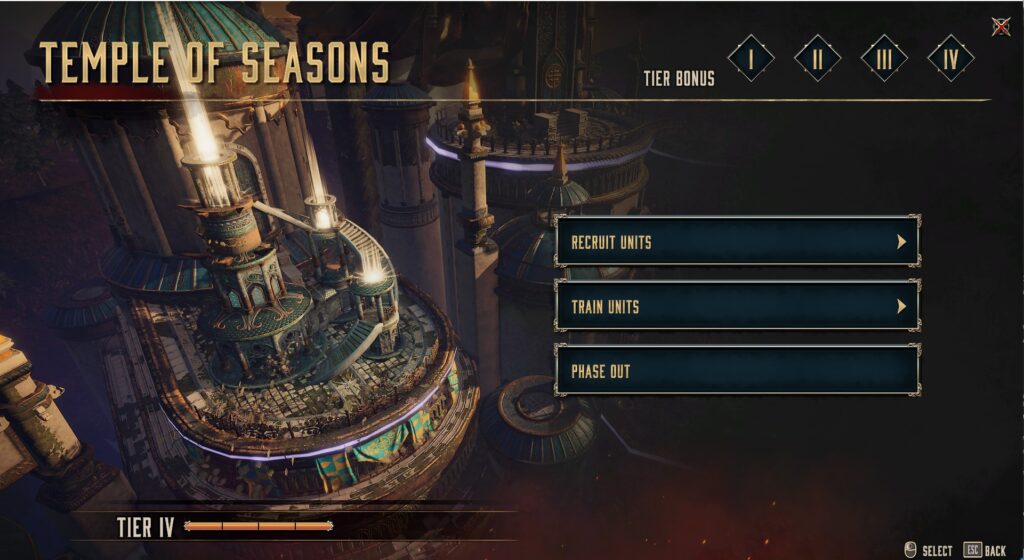
- Faction Army Buildings – There are 4 more building slots in Yillian that can be occupied by any faction’s buildings that will let you recruit units. Each faction has 3 different building that lets you recruit & train specific units from that faction. The Tier of the units one can recruit & train in a certain building is equal to that building’s Tier. In order to recruit specific Tier IV units you’ll need the corresponding Tier IV building.

The Castle Example Recruitment Building
Units & Companions:
Apart from Avyanna, our army includes various regular units, special units, and companions. During the first playtrough we can only have 2 companions in the army alongside Avyanna and the rest will have to be either regular or special (named) units. Regular units have Tiers, which decides not just how strong the unit is but also how many leadership points it costs to have a unit in our setup.
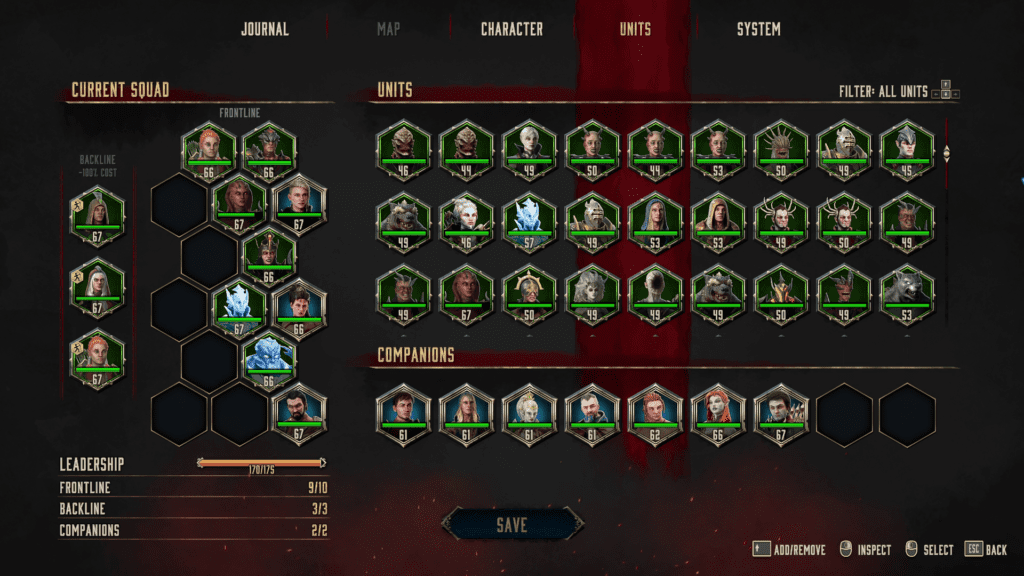
Speaking of the army setup, we can have up to 10 frontline units (Avyanna counts as one of those) and 3 backline units. Frontline units are deployed in the part of the battlefield where both sides control their armies based on the Initiative system (described above in the Combat paragraph/segment), while backline units are position in a static place and they use their backline abilities from there. There are various backline abilities: some are triggered once at the very begging of the battle and remain as passive buffs for the whole fights, while others are used every round when the specific backline unit is “on turn”. Initiative is only important for backline units in cases when the backline ability is used every turn. Protip: equip initiative shards if you want that backline skill to be used earlier in the fight.
As mentioned, in your first playtrough you can have no more than 2 companions out of the 9 total available, but once you unlock Liberation Mode (more about this explained at the end of the post) you’ll be able to make a new playtrough where you can equip all of them and have a team of 9 companions + Avyanna.
The leadership system is very simple to understand – each unit has a leadership cost. Each Yillian Castle Tier grans you 25 points and each 5 levels of Avyanna grant you 5 points. Every unit has a fixed cost as follows:
- Tier I units cost 10 leadership points
- Tier II units cost 20 leadership points
- Tier III units cost 30 leadership points
- Tier IV units cost 40 leadership points
Avyanna & her Companions don’t have a leadership cost (special units cost as much as regular ones do)!
Finding the right balance between Tier I, II, III, and IV units is the key to forming a good army. Sometimes it’s best to try and ‘build one-sided’ which is to focus on a certain 1 or 2 type of damage and only use units that do this/those + backline passives & Emotion Shards that boost this/those dmg type(s).
Loot & Itemization:
The loot system in the game is somewhat simple and easy to understand, while still providing some options for build diversity via the different stats that roll on gear as well as the different unique affixes that come with all legendary gear & some special epic gear. There are Common, Rare (Blue), Epic (Purple), and Legendary (Orange) items. The better the item the more stats and the better those stats are. You’ll also notice that items acquired at a lower level have less stats compared to higher level items (for example giving 15 Strength instead of 34 at Tier V).
Speaking of Tiers – this is another layer of the gear system. Each item can be upgraded from Tier I to Tier V at the blacksmith. Protip: at the beginning (before reaching Tier 3 Marketplace that will let you buy Epic gear) you may wanna avoid buying items from the marketplace to save up coins for Epic loot. Upgrading gear won’t use up much gold so i find it good to upgrade your and your companions’ weapons to the maximum Tier possible at all times, but buying green or blue gear early in the game may result in insufficient gold to buy purple gear when possible.
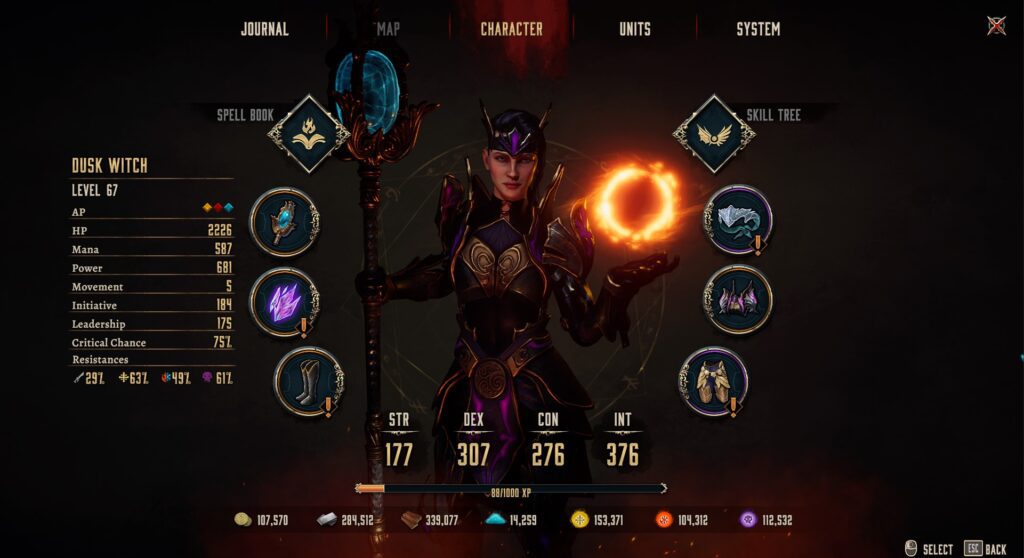
Lets have a look at Avyanna’s Equipment screen and the 6 gear slots that exist for her: Weapon, Helmet (Headgear), Emotion Shard, Chest Armor, Leg Armor, Boots. During my first playtrough i was able to find Legendary items for all slots except for the Leg armor but maybe I missed some hidden reward or didn’t do a fight that might drop one such. All of those will give various stat increases such as: Power (dmg boost), HP, Mana, Initiative, Movement, Crit Chance (caps at 75%), resistances (Physical, Divine, Unholy, Primal/Elemental), STR, DEX, INT, or CON. Mixing and matching pieces that give you the perfect balance for the build you want becomes pretty fun in the later parts of the game when Epic gear drops are plentiful and there’s a lot to choose from.
Companions can only wear an Emotion Shard + a weapon and each companion is limited to weapons that only fit their “class”. On top of that I was able to get and complete companion quests for 7 out of the 9 companions and earn legendary weapons specific for those companions. Those 7 were: Orion, Bagthal, Illmeren, Ejamar, Sharlea, Melendrach, and Sebastien. I either missed my opportunity to unlock the quest for the other 2 or picked the wrong choice in one of the dialogue options that locked me out of their quests…. or they just don’t have such.
Regular & Special Units can only be equipped with an Emotion Shard. It may not seem like much but it does allow for some experimenting and tinkering.
‘Build’ Diversity:
The diversity in terms of “Builds” comes from multiple places:
- Avyanna’s Gear
- Companions’ weapon & shard
- Units’ shards
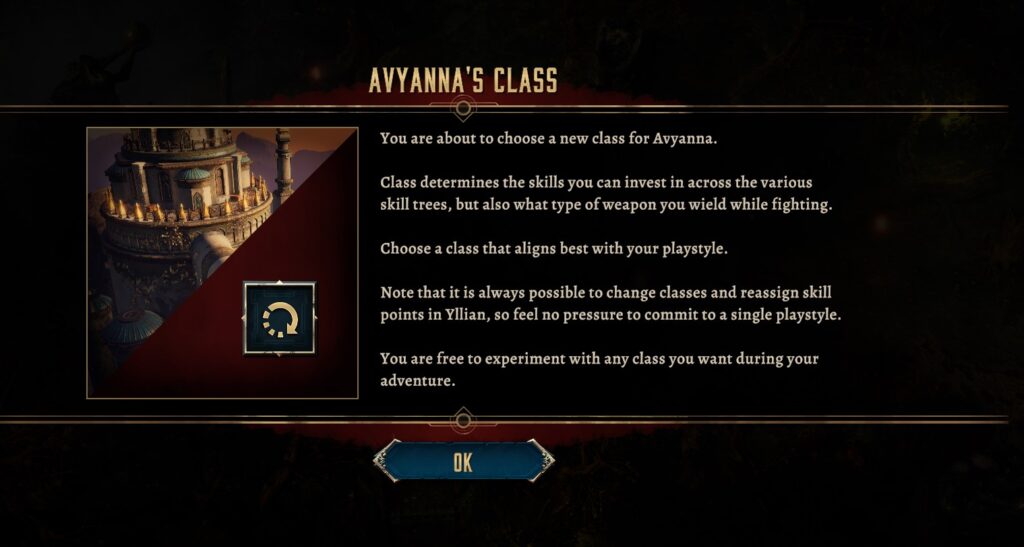
- Avyanna’s Class & Skill Tree setup
- Deciding what frontline and backline unit you use
This may not seem like much but it adds up and eventually you can have an experience that is much different based on how you do those. For example a tanker/taunter Avyanna VS a nuker/witch build Avyanna. Then are you accompanied by melee Taunting units that keep the aggro off of Avy or not as well as do you get more ranged nukers and/or healers? Then there’s the choice of whether you go for AoE or whether you go for single target burst dmg. Whether you focus on one dmg type: Physical, Divine, Unholy, Primal, or try to stack bonuses to tow of them. Do you stack crit via a backline buff and gear on your companions or do you stack %dmg of a certain type alongside power. Backline healing or just frontline healers. The options are many.
Resources:
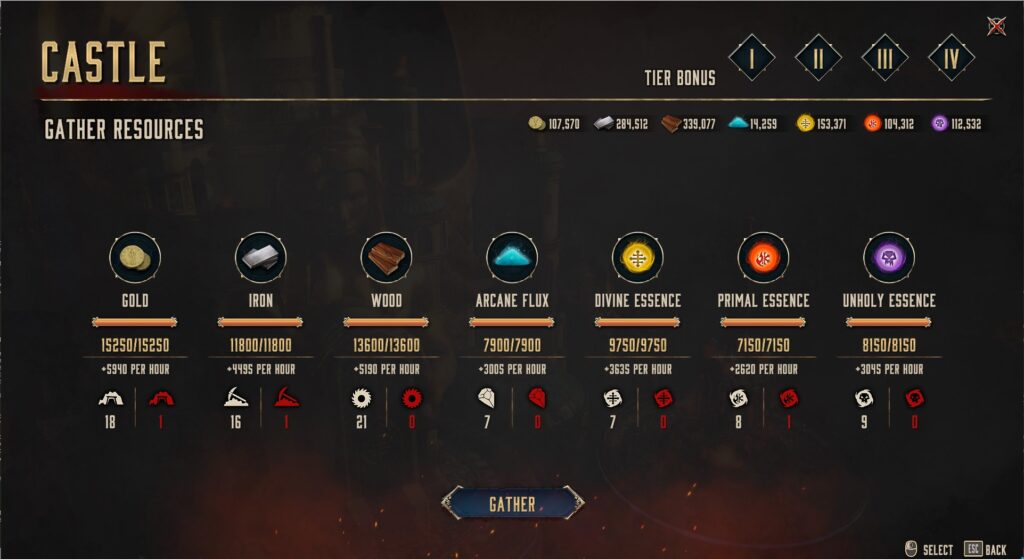
In Disciples: Liberation the following resources exist: Gold, Iron, Wood, Arcane Flux and Essences. Essence comes in 3 types that correspond to the various magical damage types:
- Divine Essence
- Primal Essence
- Unholy Essence
Marketplace:
This is the place where we can hire mercenary units (random choice of units that changes every 60 minutes) of a tier equal to or lower than the Castle & Market tier.

It’s also a place where every 60 minutes we get a random choice of items that we can buy. The item rarity depends on the market tier – T1 is white & green gear, T2 adds blue, T3 adds purple (maybe removes white), T4 doesn’t add new rarities but maybe removes green gear from the store.
The market is also where one can buy resources with gold which is a very lacking system as it doesn’t allow to exchange resources for gold or resources for other resources. Kind of a BIG missed opportunity to add more QoL here as player will find themselves with a ton of a certain resource types and nothing to do with them while there’s a lack for gold or other resources.
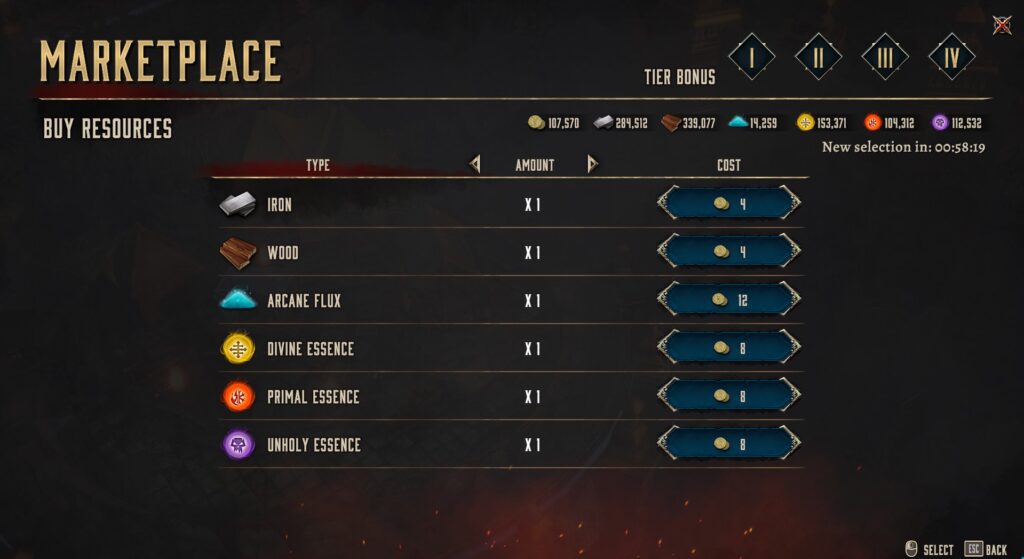
I think players will be very happy if the devs allow us to trade any material/flux/essence for gold as well as any material/flux/essence for other types of material/flux/essence at a certain Ratio.
Blacksmith:
This is the place where one can upgrade all types of equipment as well as merge emotion shards.
Upgrading gear depends on the Blacksmith tier. At Tier 1 you can upgrade items from Tier I to Tier II. Each next Blacksmith Tier will increase the maximum Gear Tier by 1. This caps at Tier 5 (max) possible upgrade at Blacksmith Tier 4.
Merging Emotion Shards doesn’t seem to be affected by the blacksmith tier (thankfully) so as long as you’ve obtained enough shards you’ll be able to merge all the way to legendary even if the Blacksmith is Tier 1. Merging emotion shards is a simple but effective system: you take two shards of the same type and rarity.
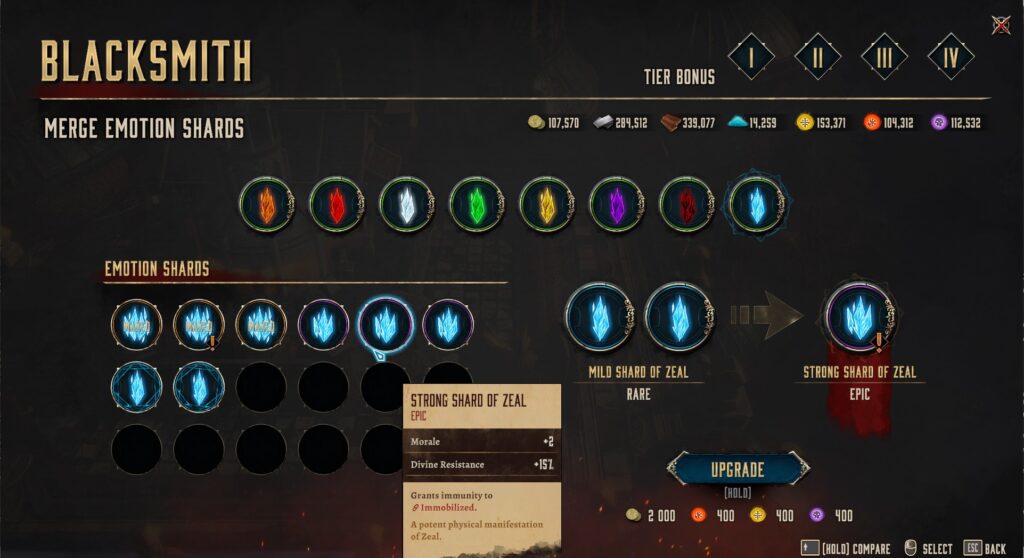
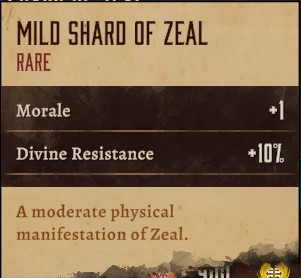
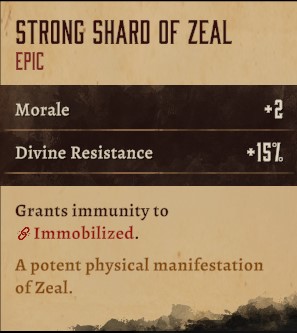
For example: merging two pieces of Mild Shard of Zeal (Rare that gives +1 morale & 10% divine resistance each) will result in one Strong Shard of Zeal (Epic that gives +2 morale and +15 divine resistance as well as immunity to Immobilized)
Liberation Mode [new game+]:
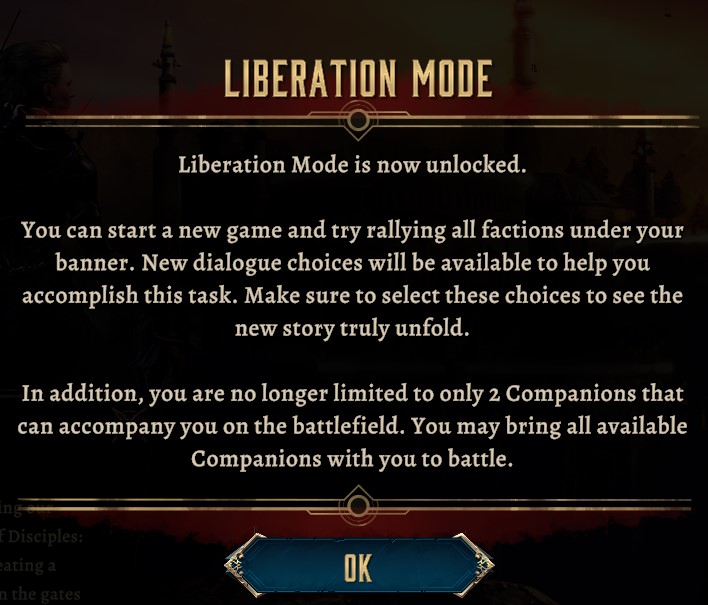
Liberation Mode is the “New Game +” of Disciples Liberation. It allows players to start a new game and try rallying all factions under their banner. This mode will unlock new dialogue choices that were unavailable during the first playtrough that will help players accomplish this task. Of course, seeing the new story unfold will require selecting those choices, however, players are not forced to pick them.
In addition, the 2 companions limit for our active army units is lifted which allows players to take all available companions with them into battle.
I did not play much (only the first few minutes) of Liberation Mode so I can not give you much info or spoil you much of what the new story choices will be like but it does sound like a good motivation for players to replay the whole game again.
PROS & CONS:
PROS
- Vast Enough & Beautiful World
- It’s Medieval/Dark Fantasy
- Well made Turn-Based Combat System
- Beautiful VFX, SFX, & OST
- Decent ‘Build’ Diversity
- Solid Itemization System
- Sufficient Quests & Side Quests
- New Game + (Liberation Mode)
- 4 Factions with multiple Tier I, II, III, IV Units for each
- Humorous dialogue & a lot of ‘hot’ moments
CONS
- Gold Drops at the beginning are far from enough compared to the prices of certain things
- Marketplace only lets you buy material/flux/essence for gold but not the reverse or material/flux/essence for material/flux/essence
- Terrible Building Phase In/Out System – would have been better to just give us more (4×3 instead of just 4) recruit building slots or let us have 1 recruitment station for each faction that handles all units of that faction
- The 2 companions frontline limit for the 1st playtrough is bad (at least give us like 4 please)
♦ ◊ ♦ ◊ ♦
This concludes my 2-in-1 Final Impressions + Basic Guide for Disciples: Liberation. If you’re interested in the game below are links to the various platforms where one can buy it (you can just click the links to open a new tab):
Platforms
Epic Games Store (creator link = I get profit when you use It & buy)