
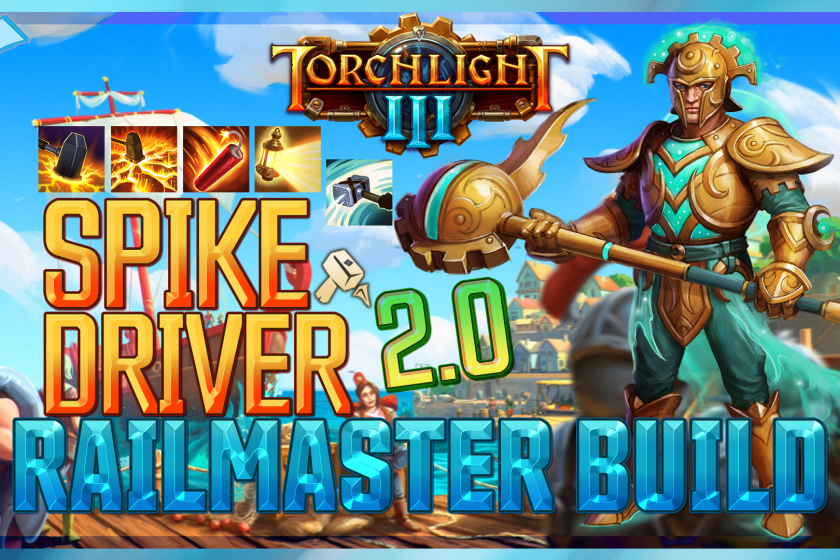
Spike Driver 2.0
EDIT: After the August 11th 2020 Patch, every build made before the relic sub-class changes will be outdated. This is one such and I’ve got a new build that may not be exactly the same but it’s still a Slammer-based Build but uses the Electrode + Railmaster combo & focuses on Spamming Chaotic Strikes (the Egg of Mayhem related skill). Here’s link a to the new build: Chaotic Mayhem
This build is a level 30 base that can be evolved into the suggested below lvl 60 complete build theorycraft. The current state of Torchlight 3 Early Access would take several hours to get to lvl 60 (maybe 10 to 15 hours based on how much you rush). The build is a revisit of my ‘Spike Drive Flash’ setup from Update 9 (October 2019). It’s a nice Slammer based setup that has nice damage and also decent survivability up the sleeve. The Tier 2 passive of Lantern Flash allows us to do +65% dmg vs Stunned, Slowed or Blinded enemies. Spike Drive always applies a 50% Slow for 6 seconds, Lantern Flash Tier 1 Blinds for 1 second, and Pound has a Stun chance Tier 1 bonus. On top of that we can use Blasting Charge to make the enemies take more damage.
Build Video footage:
The skills I use:
- Relic Active Skill (Frost Blast, Spinning Blade, Sword Smash) – good source of dps. For example, Spinning Blade is a total of 540% dmg (+110% bleed for 6s.) when you have a 20% relic damage passive and the 50% from the relic skills.
- Pound – a good source of damage + the Tier 1 bonus gives it stun chance which helps with getting the bonus dmg from Lantern Flash Tier 2. Pound Tier 2 gives all our Slammer skills +20% dmg as well.
- Hammer Spin – our escape mechanic and a movement skill. We also get 50% movement speed on Tier 1 for 6 sec. & on Tier 3 we get 50% dmg reduction buff for 6 sec after using it.
- Lantern Flash – burns + blinds for 1 sec so you can do more dmg + has an amazing tier 2 passive bonus
- Spike Drive – good damage + applies a 6 sec. slow so you can do even more damage.
- Blasting Charge – applies vulnerability to the enemies to make them take more damage. Also does decent damage, especially when you have a Blast Breaker in the Legendarium so it won’t use up your endurance. The Tier 2 gives us 20% dmg reduction in melee.
The gear I recommend using is:
- ideally, wear a good rolled version of either of the following weapons:
- Berserk Crusher – Spike Drive & Pound gain an additional Charge
- Centrifugal Demolisher – Hammer Spin deals 25% more dmg, gains 1 more charge, and has a 25% lower cooldown.
- Berserk Crusher – Spike Drive & Pound gain an additional Charge
- Alternatively the following 1-hand + off-hand combo:
- Egg of Wonder – boost our Relic Active Skill to cast another second random Relic Active Skill along with ours that is not ours i.e. if using the bane, anything that is not Venomous Maw can proc
- Blast Breaker – Blasting Charge always gain its Endurance Bonus and does not spend Endurance
- Cosmic set: The Cosmic set has nice bonuses but only 3 or 4 items of it are worth it for a Slammer based build. Pick 3 from the ones below (i suggest Chest + Legs + Shoulders ):
- Cosmic Pants – when you use your Relic Active Skill: 50% chance to regenerate all Endurance
- Cosmic Chest – gives +1 Slammer Skills (+2 with the 3 piece set bonus) [I’ve tested it and it won’t give you extra levels if the skill is already lvl 10 so go for lvl 9 if you have +1 or 8 if you have +2 to those skills]
- Cosmic Helm – gives +1 Conductor Skills (+2 with the 3 piece set bonus) [I’ve tested it and it won’t give you extra levels if the skill is already lvl 10 so go for lvl 9 if you have +1 or 8 if you have +2 to those skills]
- Cosmic Shoulders – when you activate your Relic (default relic skill): spawns an Enchanted Railhammer (a floating railhammer that follow you around and attacks enemies)
- Skittering set: If not using Cosmic Shoulders – Skittering Shoulders (spawns a +50% dmg reduction zone). I only use it without a bonus but you can combine this with 2 more Skittering pieces:
- Skittering Legs (if you will be staying close enough to the enemies a good extra dmg from Spew Acid [poison breath kind of a skill] for 40% wep dmg for 3 sec)
- Skittering Boots (On Kill: 20% chance to spawn a Poisoned Egg that deals 150% weapon Damage)
- other legendary items that boost your skills or allow you to proc good stuff
Suggested Legendarium Powers (to fill in the gaps from items you’re wearing):
- Centrifugal Demolisher – Hammer Spin deals 25% more dmg, gains 1 more charge, and has a 25% lower cooldown.
- Berserk Crusher – Spike Drive & Pound gain an additional Charge
- Egg of Wonder – boost our Relic Active Skill to cast another second random Relic Active Skill along with ours that is not ours i.e. if using the bane, anything that is not Venomous Maw can proc
- Blast Breaker – Blasting Charge always gain its Endurance Bonus and does not spend Endurance
Of course only use either of those if it is not already equipped, ideally, you’ll go for one of the Railhammers + Berserk Crusher + Egg of Wonder in the Legendarium and wear the other Railhammer.
The recommended stats to look for in your items are (the list is not in order of priority and is just listing good bonuses):
- Flat Damage
- +% Poison/Fire/Ice/Electric Damage (starts getting very good later on when you have a nice flat to boost with this)
- +% Damage to Slammer skills (it’s a good boost for Slammer based builds)
- + Health
- + Defense (the non elemental is good for any act but lesser numbers than elemental)
- -% Relic Active Skill cooldown
- +% Critical Hit Chance
- +% Critical Damage (the cap is 300%)
- +% Gear Luck (eventually try to get like 60-80% total for good drop rates – the cap is 100%) This is Item find NOT magic find. So it’s drop quantity not quality.
- -% Relic Skill Cooldown
- +% Endurance Regeneration
- +% Chance to Poison to help proc Bane’s missiles & spiders more often (if using it)
- +% Chance to Shock to help proc Electrode’s lightning & bolts more often (if using it)
- +% Chance to Bleed and/or Burn to stack the poison with the other DoTs
- + % Chance to Stun/Slow/Blind – an AMAZING roll as you do +65% damage vs slowed. Try to get Slow instead of Stun or Blind if possible.
The Skills and Passives I recommend are:
- lvl 30 Setup: https://tinyurl.com/spikedriver30
- lvl 60 Setup: https://tinyurl.com/SpikeDriver60
If you are using the Cosmic set or +1 or +2 to Slammer and/or Conductor skills make sure to remove points from a certain skill (i.e. for tier 3 instead of 10 to spend 9 or 8 when having +1 or +2 or instead of 6 for tier 2 to have 5 or 4 points invested in the skill if you have +1 or +2) Also consider wearing other(blue) items that may give +1 to a specific skill as well
Electrode skills levelup order:
- first, 10 points into Quicker Storm (or only 5 & the other 5 later after step 2)
- second, 10 points into Increasing Charge
- third, 10 point into Fried or Stronger Storm (based on personal preference)
- next, 10 points into Stronger Storm or Fried (based on personal preference)
- the last 10 points into Deadlier Bolts or Unleashed Energy (or split between those two). But if you are going for a relic cooldown setup to spam it more then consider spending them on the first tier skills (Shocking Strikes & Brutal Intent)
Flaming Destroyer skills levelup order:
- first, 10 points into Destroy Faster
- second, 10 points into Lingering Blaze or Destroy More
- third, 10 point into Lingering Blaze or Destroy More
- next, 10 points into Firestarter
- the last 10 points into Smolder
If you are going for a relic cooldown setup (to spam it more), then consider spending points on the first tier skills (Sharper Blade & Ignition Source)
After the recent Echonok Update the Coldheart is pretty nice too. This is how i spend my points:
- first, 10 points into Quicker Frost (or only 5 & the other 5 later after step 2)
- second, 10 points into Sharp Points
- third, 10 point into Frailty (you could do 5 points before step 2 then the rest after it)
- next, 10 point into Cold Snap
- the last 10 points into Thicker Ice.
But if you are going for a relic cooldown setup to spam it more, then consider spending some points on Chill Out (I think when we activate the freezes are enough so I don’t do this).
The Blood Drinker also got buffed with the Echonok Update:
- first, 10 points into Faster Blade
- second, 10 points into Weighted Blade
- third, 5 points into Bloodletter (or do this at a later stage)
- next, 10 points into Open Wound
- next, 10 points into Volatile Blood
- the last 5 points into anything you want. I like having between 1 and 5 points in Blood Spill.